Introduction
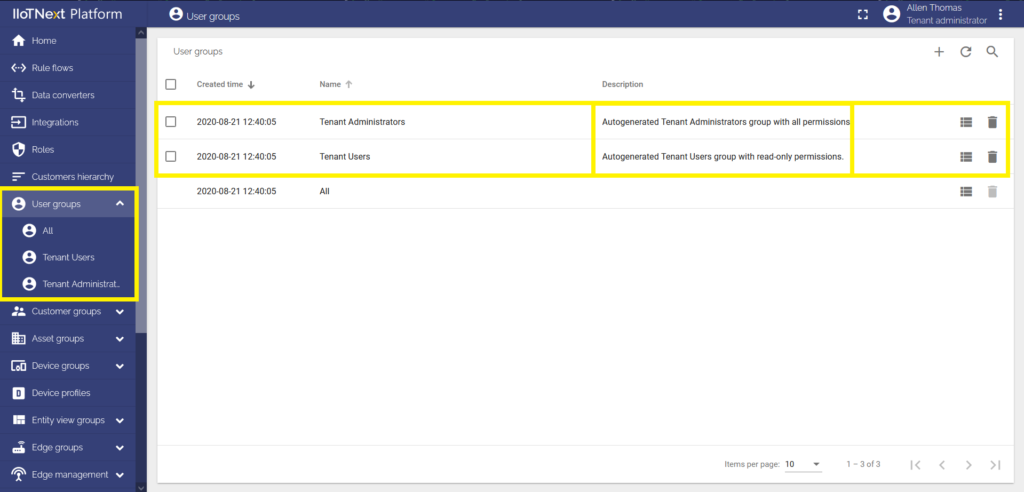
A user is an entity that can log in to the IIoTNext Platform, execute REST API calls, and access devices, assets, and other entities if they have permission to do so. Users are grouped into user groups. By default, there are two autogenerated user groups: the Tenant Administrators and the Tenant Users. A tenant administrator can directly create new users in autogenerated user groups, however, please note that they will have the access to all dashboards as the tenant administrator that has created them. Also, there is the “All” user group. If a user is created directly in the “All” group, he won’t have any permissions and will not see anything.
- Two autogenerated user groups: Tenant Administrators group with all permissions and Tenant Users group with read-only permissions.
Note: outgoing email settings have to be properly configured using the system administrator account. This is required to send an activation email to the new users.
User groups
A User group is a group of users of the same level with the same permissions. One user can simultaneously belong to several user groups.
“Tenant Administrators” user group
The created user in the Tenant Administrators group has all the permissions such as view, add, edit and delete entities. Let’s create a tenant administrator to see what he can do.
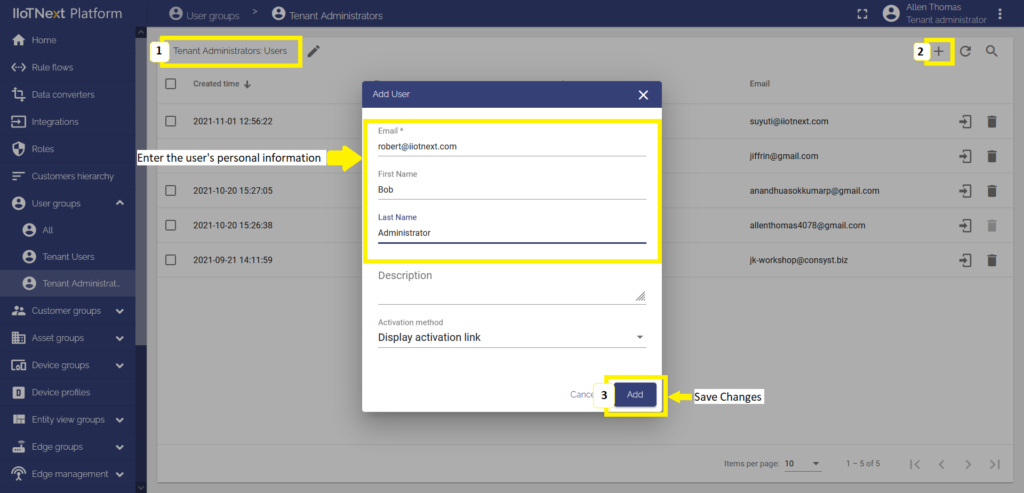
- Go to the “Tenant administrator” user group and click the plus sign in the top right corner of the screen. Enter the administrator’s email address, and first and last name. Click the Add button to add a new administrator.
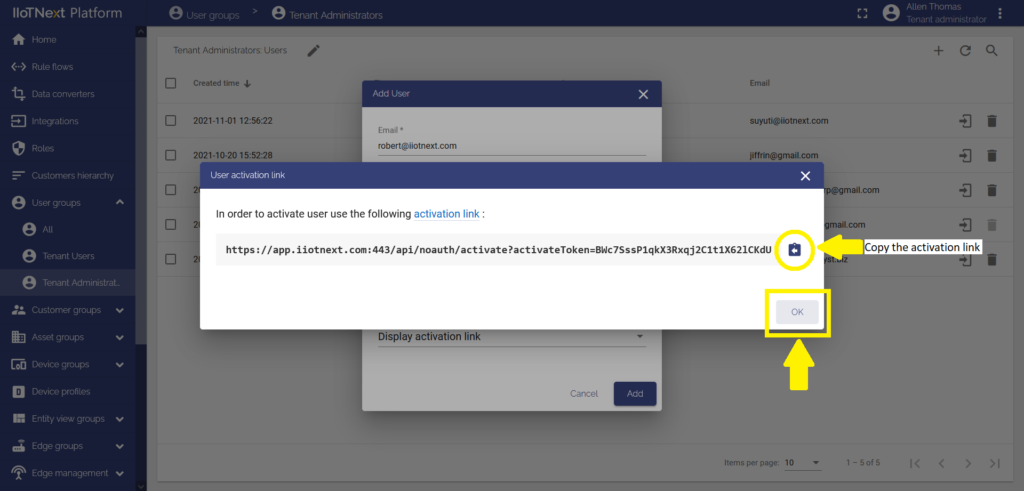
- Copy the activation link to send to the new administrator to activate his account. Click OK.
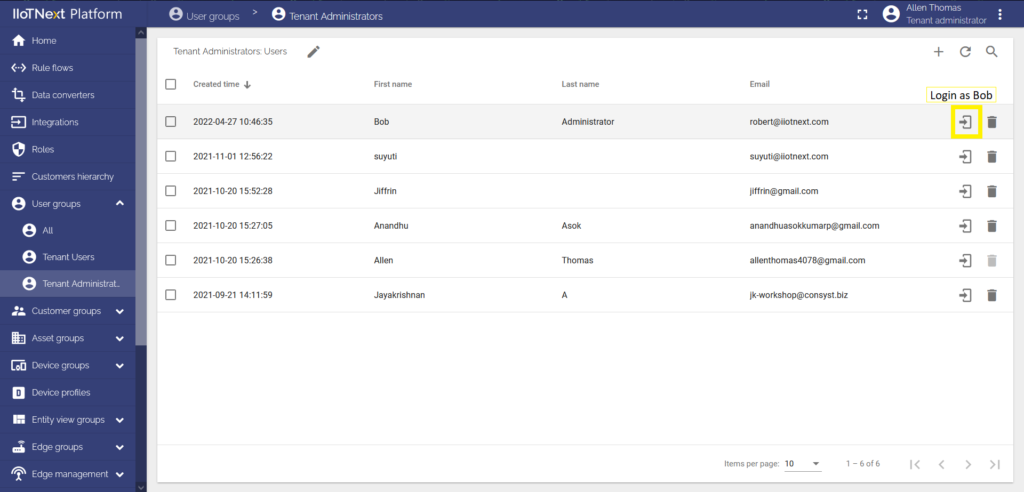
- After adding the new administrator Bob, click the phone icon next to the name to log in as him.
- Accept Privacy Policy.
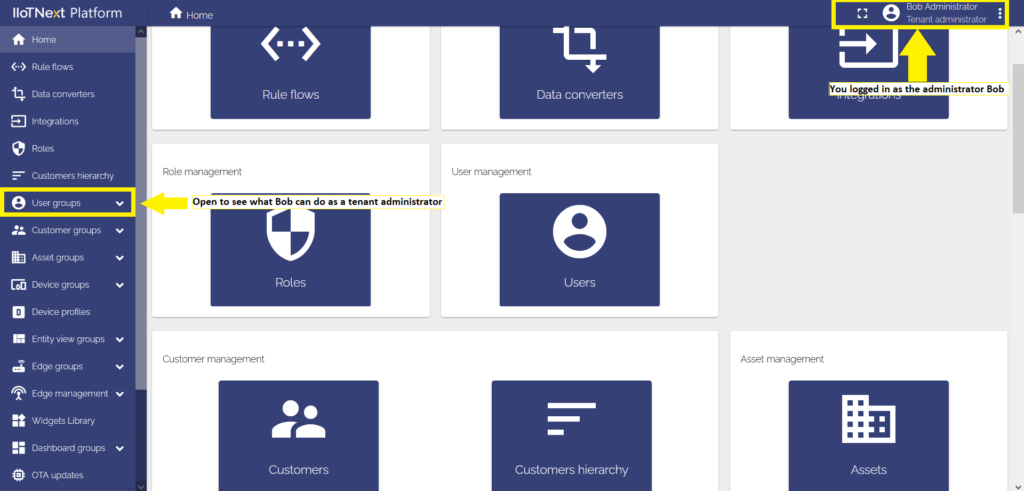
- When you are logged in as administrator Bob, open User Groups from the left main menu.
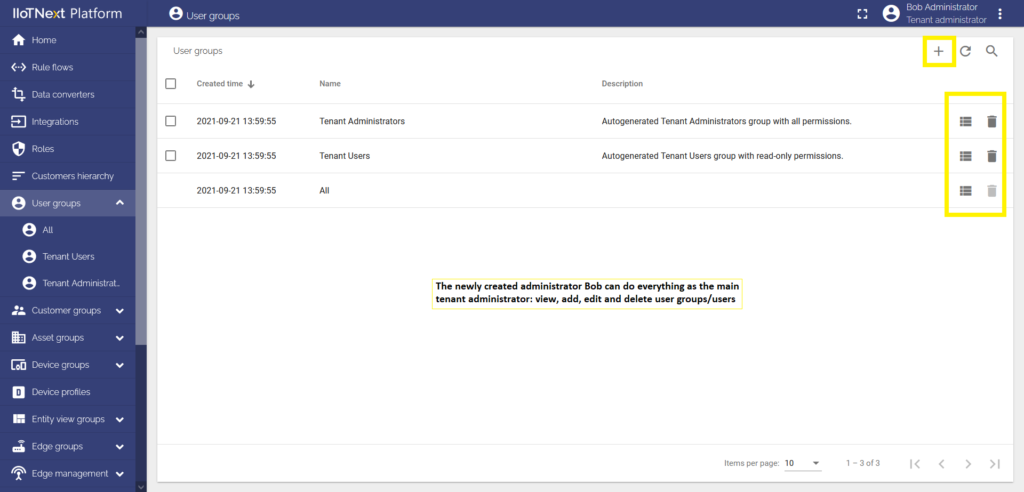
- Administrator Bob can do everything the main Tenant administrator can do.
“Tenant Users” user group
The tenant users group has read-only permissions. Let’s create a tenant user to see what he can do.
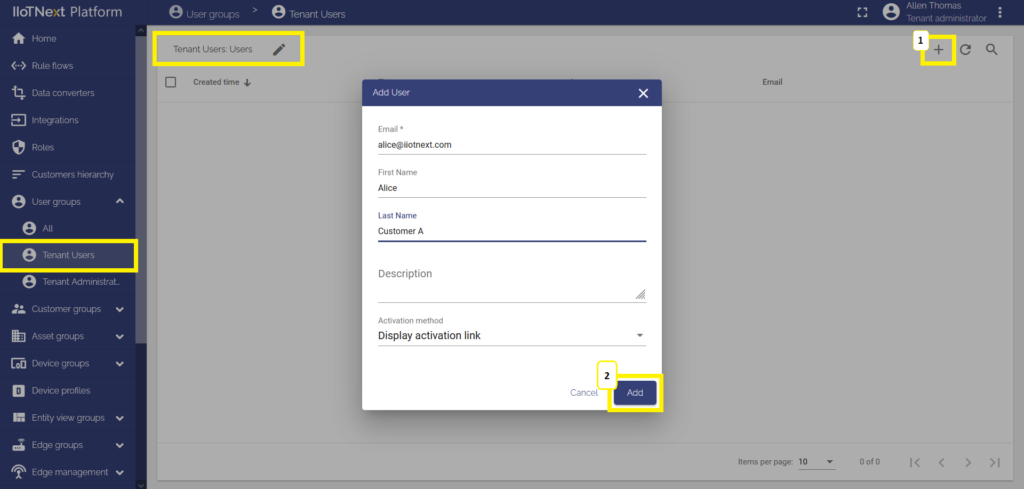
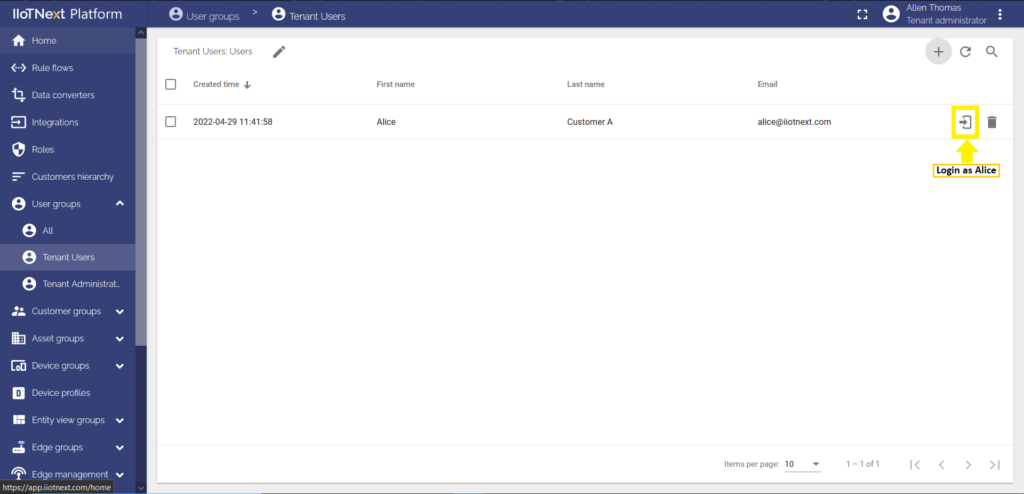
- Go to the “Tenant user” user group and click the plus sign in the upper right corner of the screen. Enter the email address, and first and last name of the user. Click the Add button to add a new user.
- After adding a new user Alice, click the phone icon next to the name to log in as her.
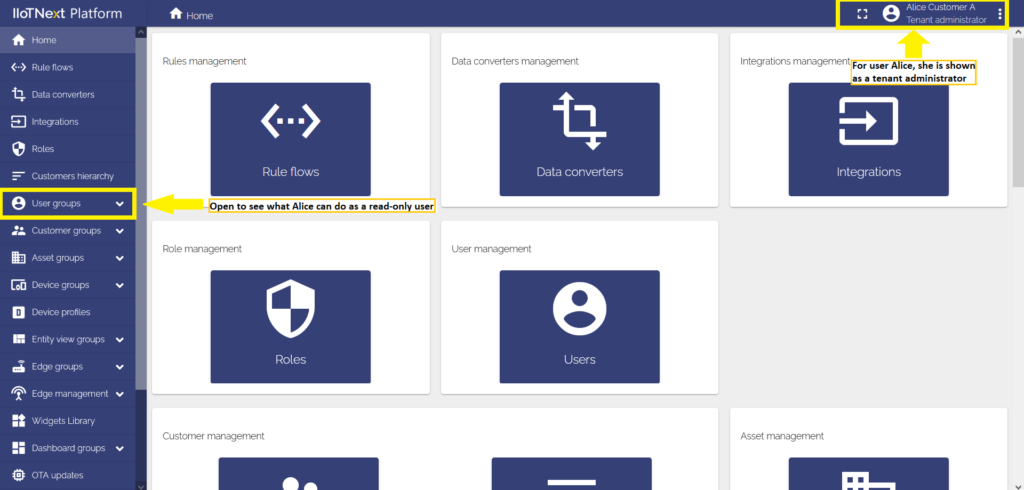
- Accept Privacy Policy and Terms of Use. Click Continue.
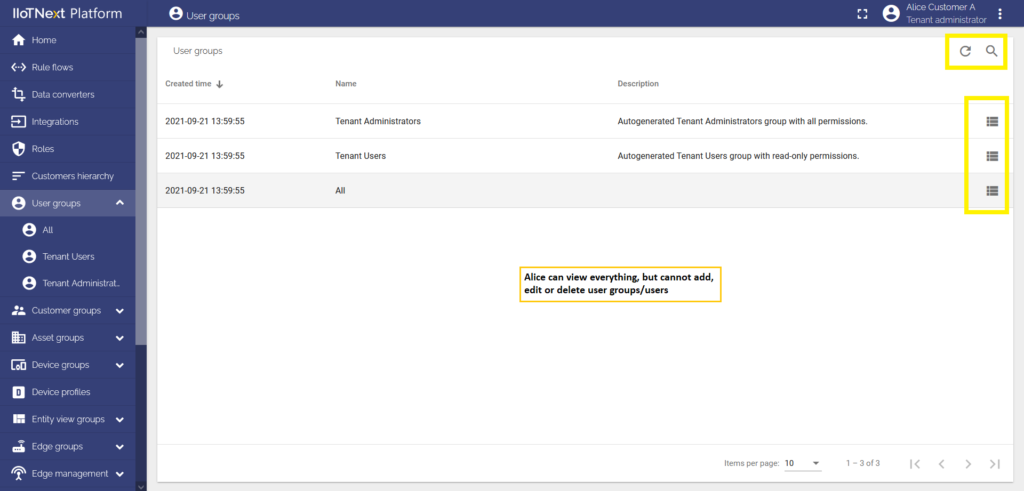
- As you logged in as the user Alice, open the User groups from the left main menu.
- User Alice can view everything as the main Tenant administrator can, but cannot add, edit or delete entities.
Adding a new user group
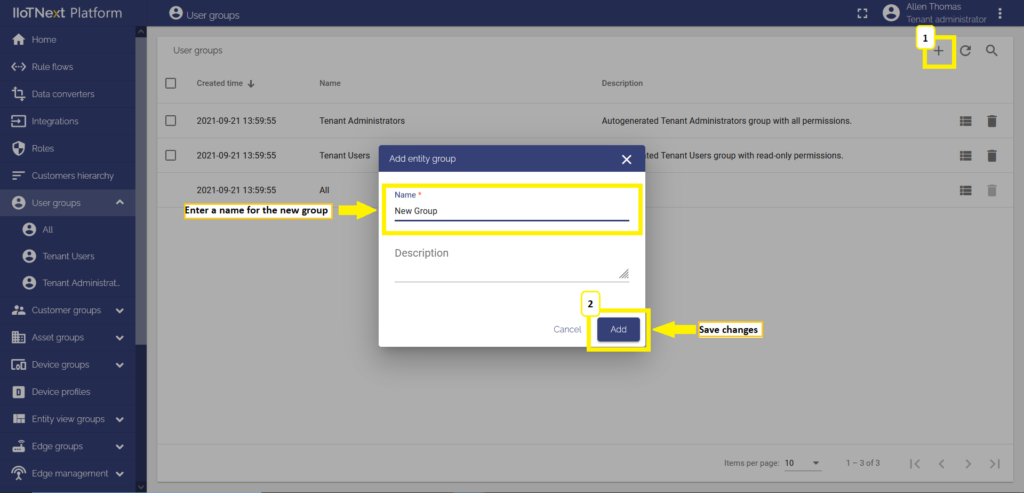
Tenant or Customer administrators can create user groups with custom permissions. Create a user group and add the previously created Roles in the Roles tab in the user group details to configure user’s permissions in the new group.
- Click the plus sign to open a dialog window, enter a name for the new group, and add the new group by clicking the Add button.
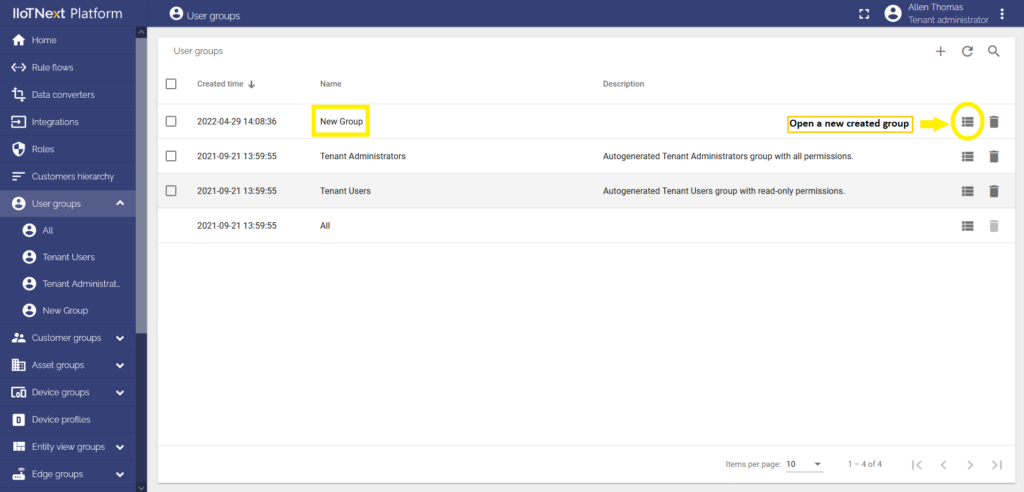
- After adding a group, click the bar icon next to the name to open a new group.
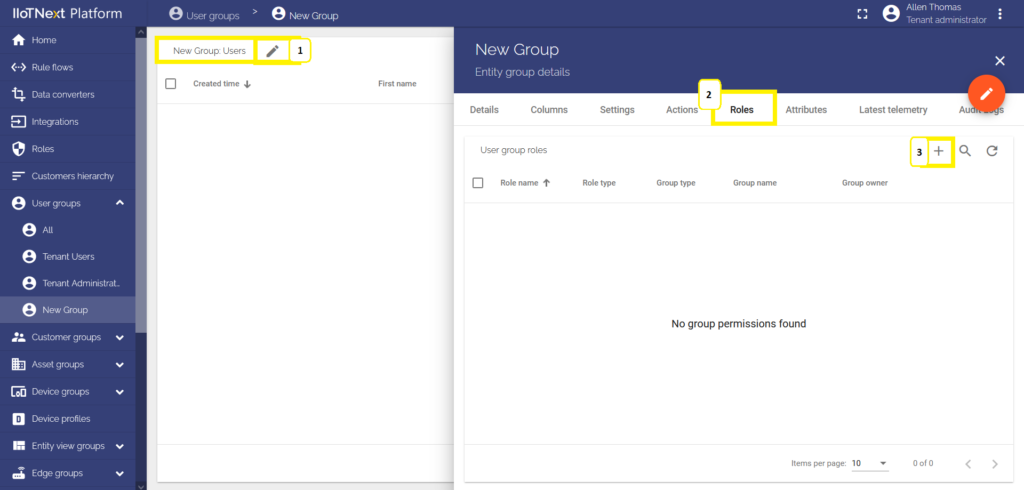
- Click the pencil icon in the top left corner next to the group name to open the entity group details. Open the Roles tab and click the plus icon to add a new role.
Edit user group
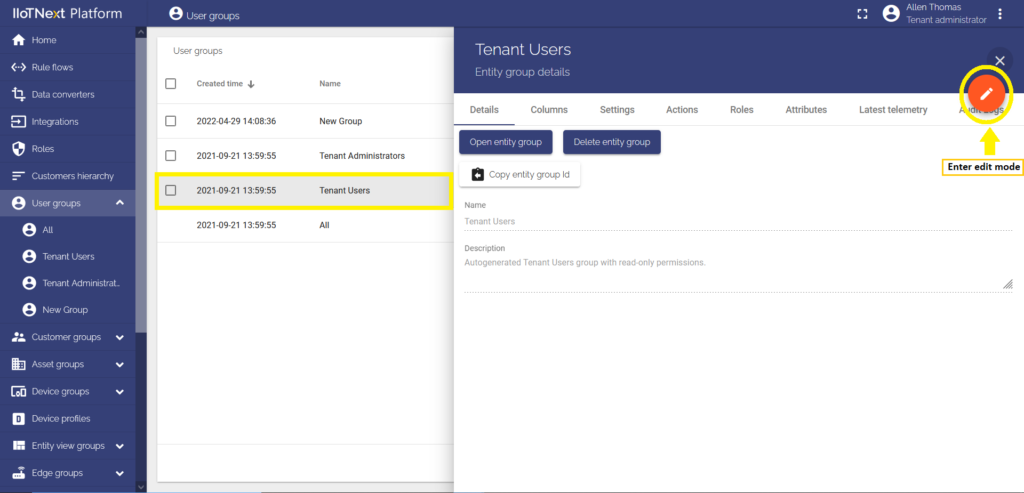
Like any group of entities, the user group can be easily customized and edited. To edit a user group, click the user group row to enter details about the user group.
- Click the pencil icon in the upper right corner to enter edit mode.
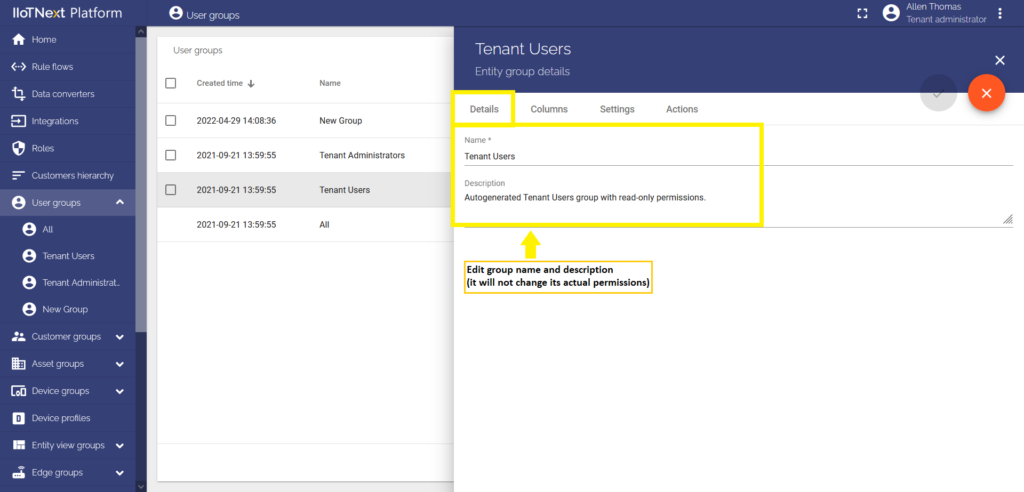
- On the Details tab, you can edit the name and description of the user group. However, please note that changing the description will not affect the permissions of the user group.
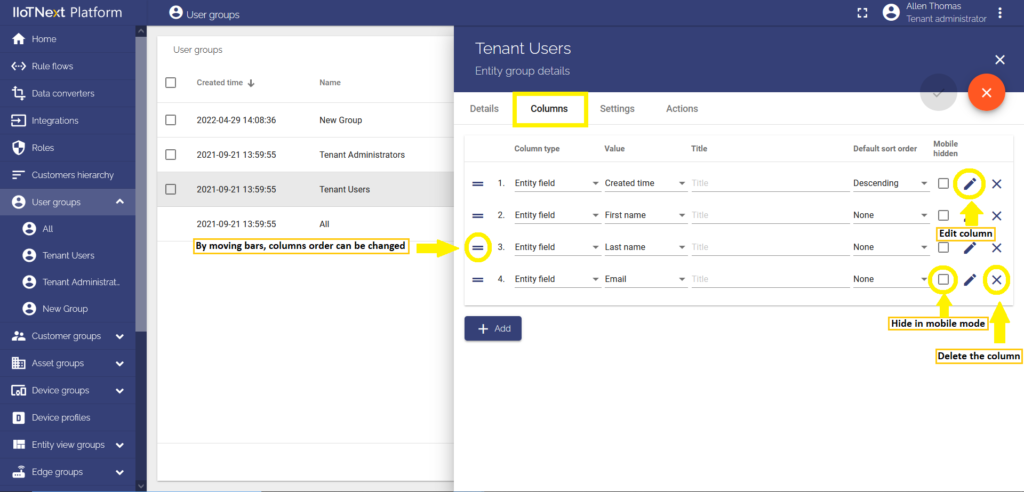
- The Column tab is responsible for the type, value, interface, and sort order of the columns of the user group.
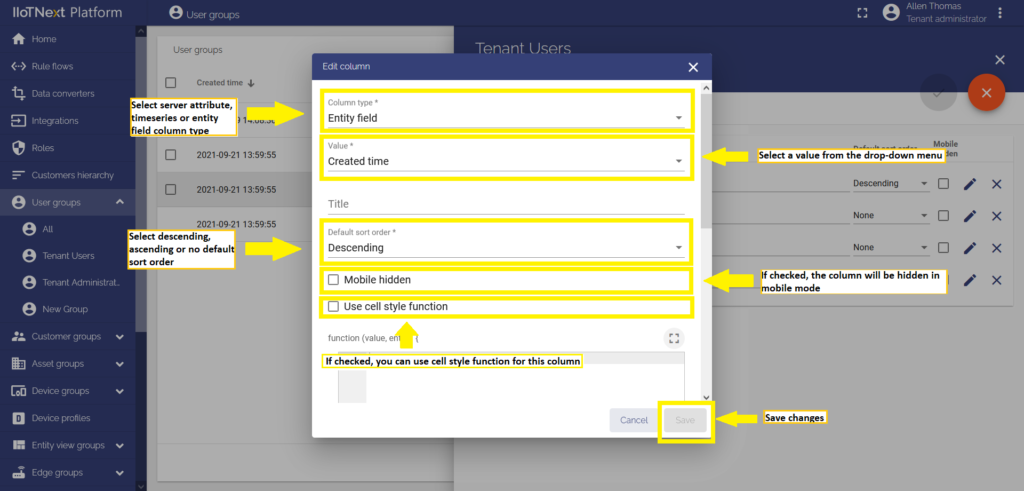
- To edit an existing column, click the pencil icon at the end of the column row. Make your changes and click the Save button to apply the changes.
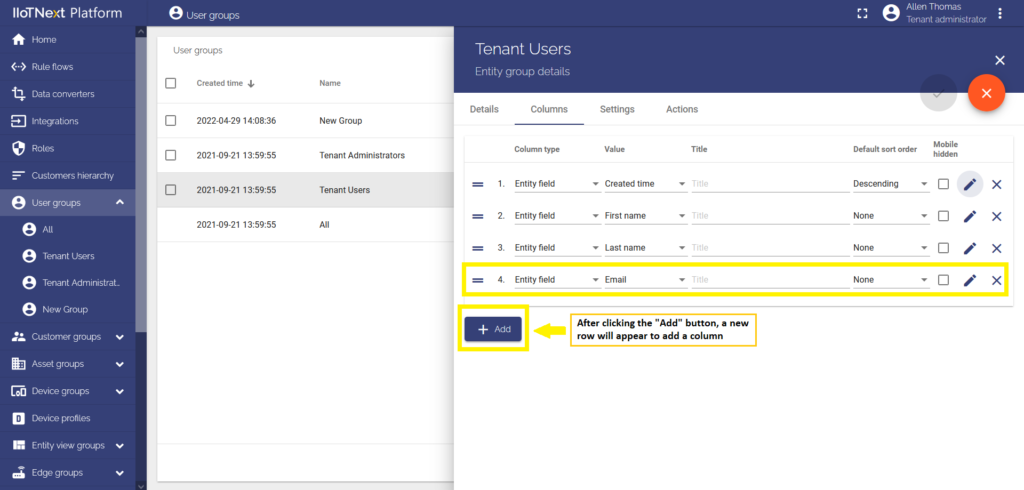
- To add a new column, click the Add button in the lower-left of the dialog. A new row will appear where you can add a column.
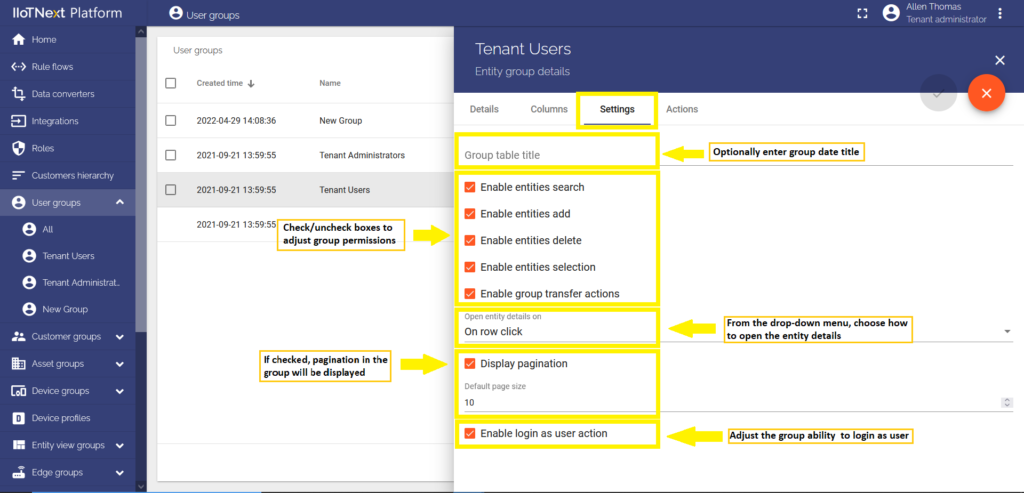
- The settings tab is responsible for the general permissions and the interface of the columns.
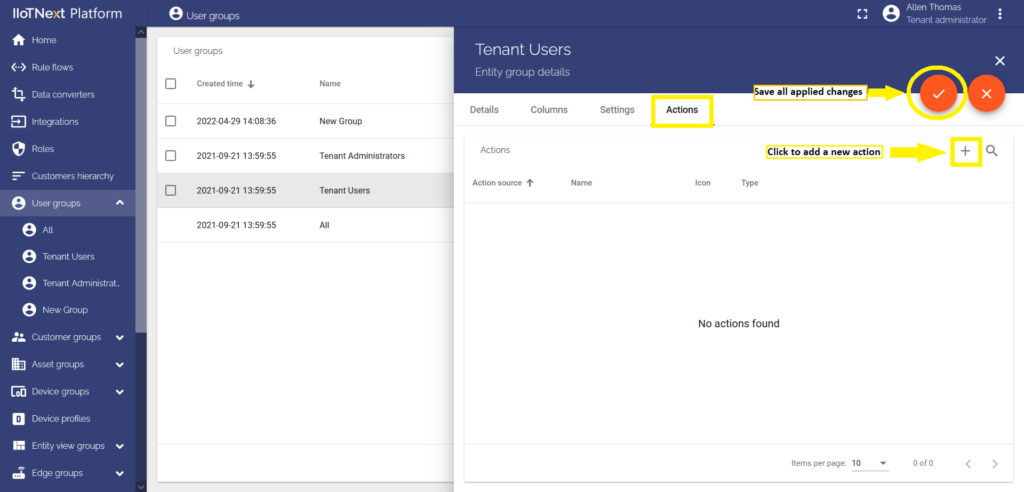
- Actions tab allows navigating to a specific dashboard or adding a custom action (To learn more about the Actions, see the link below).
Learn more about actions.
Delete user group
A user group can be deleted by the user with sufficient permissions. Please note that the users that belong to a group will not be deleted. A single user can be a member of multiple user groups and is always a member of the special group “All”.
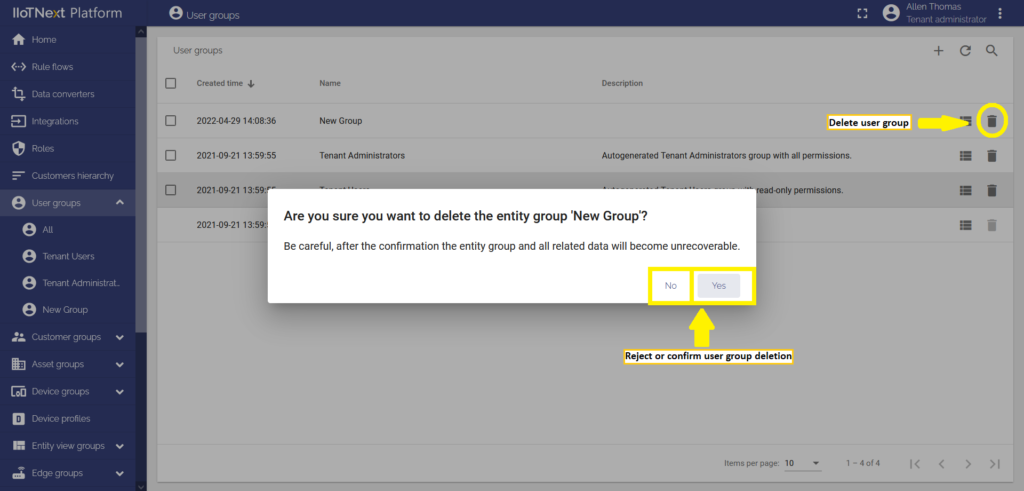
- To delete a user group, click the trash can icon at the end of its row and confirm the deletion.
Delete user
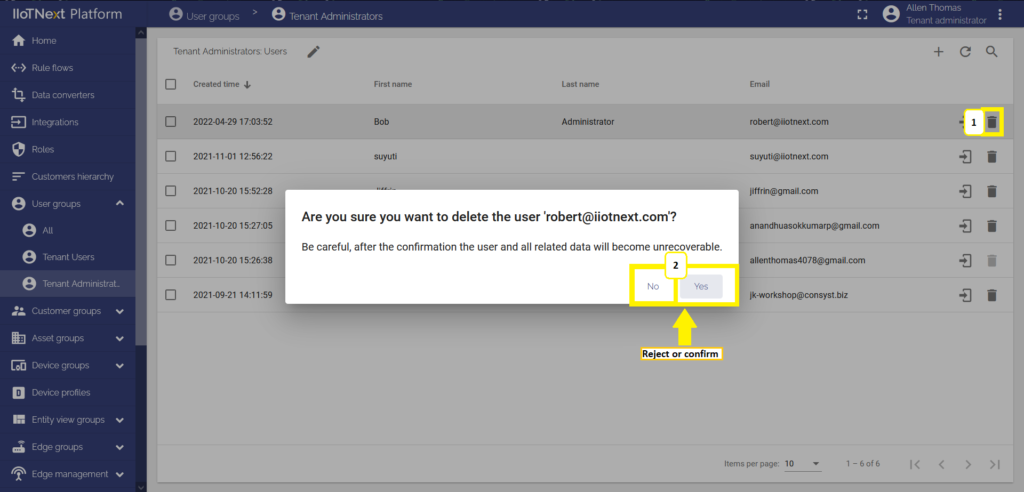
There are cases when you have several created users in a group and you need to delete one of them.
- To delete a user, click the trash can icon at the end of its row and confirm the deletion.
